Translate

Wednesday, June 17, 2015

Apple and Almond Smoothie


1 Apple sliced
1 cup almond milk
1 handful of spinach
1/2 tsp cinnamon 
Pinch of nutmeg
1 cup of ice


Put all ingredients in a blender, blend until smooth. 

Tuesday, June 16, 2015

Smoothie Days ~'A quick weight loss


Once a month I do my smoothie days. Two fruit filled days, that will give you a vitamins boost and helps you lose that little extra weight. 

Ingredients (for 1 day)

1 banana
2 apples
10 large strawberries 
1 handful of blueberries
1 handful of raspberries 
1 handful of blackberries
1 cup crashed ice

Blend everything together. Divide in 3. Sip through the day. Drink 7-8 bottles of water throughout the day. Do it for two days, without eating or drinking anything else and you can lose around 5-6 lbs 


Tuesday, April 28, 2015

Ham and cheese Involtini

Ingredients 

6 large thin steaks
6 cheddar cheese slices
12 ham slices
Pickles sliced (optional)
Dried rosemary
Minced garlic
Salt and pepper

Lay a steak flat on a plate, sprinkle with rosemary, garlic, salt and pepper.
Cut the cheese slice in two and lay on the steak. Add two slices of ham. Add the pickles if you like them. Roll the steak, secure with a toothpick.

Oil a pot with Olive oil. Cook the Involtini until all sides are well cooked.
Serve with Béarnaise Sauce (see previous recipe)  


Quick Bearnese Sauce

Ingredients 

1 stick of butter, cut 
1 tbsp lemon juice
1 tbsp white vinegar
1tbsp minced chives
2 egg yolks 
1/2 tsp dried tarragon
1/4 tsp salt
1 pinch pepper

Combine all ingredients in a saucepan. On low heat, whisk until butter is melted. Keep whislomh until thickened!
Remove from heat! Whisk before serving 

Tuesday, March 31, 2015

Salmone al Cartoccio

Ingredients:

4 pieces of salmon
Sage leaves
Parsley
Mint leaves
1 garlic clove
Extra virgin olive oil
Lemon juice
Lemon slices
Salt and pepper

Aluminum foil for cooking


Wash sage, mint and parsley, dry with a clean cloth. Chop sage, mint, parsley and garlic. 
Cut 4 sheets of aluminum foils, big enough to hold the salmon and herbs and leaving some extra space.
Lay salmon in the middle of the aluminum foil, add herbs and garlic mix. Sprinkle with olive oil and lemon juice, salt and pepper.
Put lemon slices on top of the salmon.
Close the aluminum foil leaving some space between salmon and the top of the foil 
Preheat oven 350
Cook for 25 minutes


Tuesday, March 17, 2015

Panna Cotta

  • For 6-8 small crème caramel-type moulds:
  • 1 litre of cream (2 pints) or 3/4 litre cream and 1/4 of full cream milk
  • 3 level teaspoons of sugar Half a fresh vanilla pod
  • Approx 5 g (1 teaspoon) agar-agar in powder, flakes or sticks
  • For the sauce: 300 g (10 oz) of ripe strawberries, kiwis or mango
  • Sugar

  • Split open the vanilla pod and place in a saucepan with the sugar and cream (and milk if using). Bring to the boil, stirring constantly.
  • When the mixture has come to the boil, add the agar-agar, lower the heat and leave for a further two or three minuts.
  • Pour the mixture into the moulds, allow to cool and place in a refrigerator for at least 2 hours before serving.
  • Wash and prepare the fruit, cutting it into small pieces.
  • Add just enough sugar to sweeten (approx 1-2 teaspoons, depending on the fruit).
  • Heat on a low flame for a few minutes, just enough for the fruit to soften.
  • Leave to cool. Serve spooned over the panna cotta once out of its mould.

Friday, February 27, 2015

Cajun Teriyaki Garlic Shrimps

Ingredients for 4 serving 

40 large thawed cooked shrimps 
8 tbsp Teriyaki marinade
8 tbsp Olive oil
Ground black pepper
Garlic powder, enough to cover shrimps
Cajun seasoning, enough to cover shrimps
Honey


Heat oil in a skillet
Season shrimps with garlic powder, pepper and Cajun seasoning
Sauté shrimps for 5 minutes, add honey and Teriyaki marinade, sauté for another 2 minutes.
Enjoy!

Saturday, February 22, 2014

Mother "Pluckers" - Dr. Pepper Sauced Boneless Wings Recipe from Pluckers Wing Bar

If you ever visit Austin, TX you HAVE to eat at Pluckers. Pluckers Wing Bar is part restaurant and part honky tonk joint with heavy emphasis on serving chicken wings and beer. There are few Pluckers in Texas and some in Louisiana, but the Pluckers located in Austin is the original one.
The idea for Pluckers came about circa 1991 in the dorm room of the University of Texas. Dave and Mark couldn’t find a good wing place in Austin that had dine-in, take-out, and delivery. After four years of testing sauce recipes and applying for loans, in 1995, their first wing restaurant was finally opened.
Located in the heart of West Campus, no UT college experience would be complete without going to Pluckers.  As the “Official Home to the Freshman” nearly every student has graced their presence there and only the brave have succeeded in getting their proud Polaroid picture on the Wall of Fame by eating 25 wings with the spiciest sauce – Fire in the Hole, a sauce so numbing, it may as well be used in lieu of Novocain.
Their boneless wings are pretty delicious but their wings are obviously the show stopper – juicy and tender chicken dipped in your choice of 16 great sauces +1 sauce of the month. I recommend all their sauces but my personal favorites are Baker’s Gold, Goldrush and Dr. Pepper (Dr. Pepper wasn’t ordered this time around, but I promise I will get to it).
The atmosphere is always a blast. On any given night, there’s something fun: Trivia Night, Karaoke Night, etc. Be forewarned, there’s always a long line after football games and during dinner but don’t let that deter you. Grab a drink at the bar, Pluckers has lots of drinks specials and their restaurants always have tons of TVs so you can watch the night’s best games.
With the plethera of drink specials and food specials, there’s always a deal here. After football and basketball games, if the Longhorns play well, they pass out coupons for 5 free wings. If you’re part of the Pluckers club you get free appetizers and free birthday meal. Tuesday kids eat free and Fridays school faculty and students get free appetizers. I’m probably leaving out a lot of other freebies, but you’ll just have to check it out yourself. (from
cforcuisine


Anyway here one of their recipes:

Dr. Pepper Sauced Boneless Chicken Wings

Ingredients
  • 2 boneless skinless chicken breasts cut into nugget sized pieces
  • 3/4 cup flour
  • 1/2 Tsp salt
  • 1/2 Tsp. pepper
  • 1/4 Tsp. garlic powder
  • 1 can Dr. pepper
  • 1/2 cup brown sugar
  • 1/4 cup ketchup
  • 1/2 Tsp. Tabasco sauce
  • 2 TBSP butter
  • Oil for frying
Combine the flour, salt, pepper, and garlic powder. Toss the chicken in the flour mixture, coating completely. Put the coated chicken in the fridge for at least 1 hour. This will help the coating adhere to the chicken during frying.
Meanwhile, in a medium saucepan, bring the can of Dr. Pepper to a boil, reduce heat and simmer briskly until reduced to about 1/8th the amount. Add the brown sugar, ketchup, Tabasco and butter and simmer until a nice thick sauce. Set aside.
Heat the oil to 350 degrees. Remove the chicken from the fridge and fry in the oil until golden brown and the chicken is cooked through. when all chicken is cooked, toss in the sauce until completely coated.
Serve and enjoy.

Sunday, October 6, 2013

Limoncello

Limoncello is a liqueur made from lemons. In Italy, it is usually served after dinner. You will find locally made Limoncello in Sorrento (near the Amalfi coast) and in Liguria. Both of these areas grow the lemons used to create the Limoncello. If you want to have the taste of Italy at home, try this recipe to make your own.
Please note that this is a very detailed recipe for those who have never tackled liqueur making before. Many Limoncello recipes are much simpler and faster.

Ingredients list

  • One Bottle (750 ml) Everclear (95% alcohol 190 Proof)
  • One Bottle (750 ml) good but not necessarily premium vodka (40% alcohol 80 Proof)
  • 15 large thick skinned bright yellow lemons (without scars or flaws in the skin if possible.)
  • 750 ml (about 3 cups) filtered tap water or distilled water (not mineral water)
  • 4 cups pure cane white sugar (this will give thin syrup consistency; if you prefer a thicker syrup, experiment with increasing your sugar by 1-2 cups)

Tools list

  • A very clean and dry gallon glass jar (the kind you make sun tea in is perfect)
  • Large supplies of unbleached cone coffee filters; half of them #2 size and half of them #4 size
  • 22 clean, 100 ml. bottles that seal tightly. I found mine at Cost Plus/World Market. They are clear glass with narrow necks. The ceramic looking white hard plastic stoppers have orange rubber gaskets and built in metal hasps to hold the stopper tight. They cost $1.99 each. If you would like to try to get the exact same bottle, the label says World Market "Spain" K1 and the UPC code is 2056 8498.)
  • One large gallon sized glass (pyrex style) pitcher
  • One cup sized metric measuring cup
  • One punch ladle
  • Two funnels with inch mouths. One should have a bowl capacity to fit the #4 coffee filter, the other to fit the #2 coffee filter.

Step One

Day 1

  • Pour the bottle of Everclear and the bottle of vodka into the gallon jar.
  • Try to use organic lemons or make sure that lemons are cleaned to remove all pesticides, dirt, and fertilizer chemicals. Dry the lemons. Use a potato peeler to peel just the yellow part of the skin off the lemons. Make sure you have NO white pith on the back of the peels, because this causes bitterness in the finished liqueur. Try to make the peel pieces as large as possible, because this will make the straining process easier.
  • Put the lemon peels in the gallon jar and stir gently.
  • Cover tightly and put away in a cool (not cold) dark place for alcohol to extract oils from peels, creating an infusion.

Days 8, 22, & 36

  • Gently stir lemon peels to refresh exposure to alcohol. Return to cool, dark place.

Day 43

  • Gently stir lemon peels.
  • Scoop out one of the larger peels and test flexibility. If peel breaks like a potato chip, you will move on to the next step. If peel is still flexible enough to bend without breaking, return to cool dark place and try again in another week.

Step Two

Day 1

  • Dissolve sugar in water and bring to boil over high heat. Boil for 5 minutes.
  • Set syrup aside to cool. It must be room temp before adding to infusion.
  • Use a slotted spoon to gently scoop lemon peels from the infusion and discard. To avoid creating small pieces that will make straining more difficult, try not to break peels as you remove them.
  • Using the larger funnel, the ladle, and #4 coffee filters, slowly strain infusion through filters into large pitcher. This is a messy process. The filters will clog quickly and you will use many of them.
  • Rinse and dry gallon jar.
  • Repeat straining process, transferring infusion from pitcher to original gallon jar by straining again through #4 coffee filters.
  • Return filtered infusion to jar and add COOLED syrup.
  • Return to cool dry place for 40 days to begin mellowing process that combines alcohol infusion with syrup to create Limoncello.

Day 40

Note: If you moisten the filters before the straining, you will not waste liqueur by soaking it into the filter.
  • Begin filtering Limoncello. Use punch ladle to pour a small amount into a filter-lined funnel held over the small measuring cup.
  • Fill measuring cup to an even ml level. (100, 200, 300, etc.)
  • Using smaller funnel and #2 sized filters, filter one last time into individual 100-ml bottles. You have now filtered the liqueur a total of 4 times.
  • Seal bottles VERY tightly. Remember, if you are using different bottles and are sealing them by corking -- corks breathe. So consider dipping the neck several times in melted wax after corking.
  • Label and/or tag bottles.
  • Return to cool dark place for storage.
Your Limoncello is now ready to enjoy. However, the longer it sits and "ages" the smoother it becomes.
Serving suggestion:
As an after dinner drink, serve one ounce in a small chilled aperitif glass.
As a refreshing dessert, pour an ounce over a large scoop of shaved ice and garnish with a lemon twist.
Limoncello is best when served directly from the freezer.
100 ml -- 45% alcohol by volume
This liqueur is homemade for private use only. Not intended to be sold or served commercially.

Fave dei Morti - Beans of the Dead

Fave dei Morti, beans of the dead, are the little bean-shaped cakes that Italians eat on November 2, Il Giorno dei Morti, or All Souls' Day. These small cakes, made of ground almonds and sugar combined with egg, butter, flour, and subtle flavorings, are traditionally eaten throughout Italy on the day that everyone decorates the graves with flowers and says masses for departed souls.


Fave dei Morti, beans of the dead, are rich and delicate little cakes. Despite their macabre origin, you will want them often. Color them orange and serve at Halloween or Thanksgiving parties with ice cream in goblin or pumpkin molds. Or leave them white and store in tightly closed tins, to serve with coffee or tea to unexpected guests.


INGREDIENTS (for 12 small cakes)


  • 1/2 cup sugar
  • 3 tablespoons butter
  • 1/2 cup finely ground almonds (unblanched)
  • 1 egg
  • 2 tablespoons all purpose flour
  • 1 tablespoon grated lemon rind
  • Vegetable coloring, if desired  

  • DIRECTIONS

    Combine sugar, butter, and ground almonds. Beat egg and add to other ingredients, mixing thoroughly. Add flour and flavoring. Work dough until smooth and make into a roll about 1 1/2 inches in diameter. Wrap in waxed paper and refrigerate 2-3 hours. Then cut off bits of dough and mold into kidney-shaped pieces about as big as large lima beans. Bake on greased cookie sheet in moderate oven (350° F.) about 15-20 minutes, or until golden brown. Cool 5 minutes before removing from pan with spatula.

    Tuesday, September 24, 2013

    Basic Pancakes Recipe


    1 Egg
    1 Cup of Flour
    3/4 Cup of Milk
    2 Tbsp Butter
    1 Tbsp Sugar
    3 Tsp Baking Powder
    1/2 Tsp Salt

    Mix all together, pour in a hot greased pan. Cook until both sides are golden.

    Pumkin & Coconut Bread

    Pumpkin Coconut Bread

    Coconut and pumpkin team up to make a refreshing and flavorful pumpkin bread.
    The coconut flavor comes from a pudding mix.

    Ingredients:

    • 2 eggs, beaten
    • 1 cup granulated sugar
    • 3/4 cup vegetable oil
    • 1 1/2 cups all-purpose flour
    • 1 teaspoon baking powder
    • 1 teaspoon baking soda
    • 1/2 teaspoon salt
    • 1 package (3 1/2oz) instant coconut cream pudding mix
    • 1/2 teaspoon ground nutmeg
    • 1/2 teaspoon ground ginger
    • 1/2 teaspoon ground cinnamon
    • 1 cup pumpkin, canned or fresh cooked and mashed
    • 1/2 cup chopped pecans or walnuts

    Preparation:

    Combine eggs, sugar, and oil in a large mixing bowl; beat at medium speed of an electric mixer hand-held until well blended.In a separate bowl, combine flour, baking powder, soda, salt, pudding mix, nutmeg, ginger, and cinnamon; add to sugar mixture alternately with the mashed pumpkin, beginning and ending with flour mixture. Mix well after each addition. Stir in pecans or walnuts.Pour batter into a greased and floured 9x5x3-inch loaf pan. Bake at 350° for 1 hour, or until a wooden pick inserted in center comes out clean. Cool in pan 10 minutes; remove loaf to wire rack to cool completely.

    Friday, September 13, 2013

    Pico de Gallo


    Ingredients:

    6 Roma Tomatoes
    6 Garlic Cloves
    2 Jalapenos Peppers (more if you like very hot)
    1 Bunch Cilantro
    7-8 Large Basil Leaves (this is my add on original recipe) 
    1 Small Bunch Chives
    1 Lime
    Salt to taste


    Chop the tomatoes, garlic, cilantro, basil, chives japapenos. Mix all together, add lime juice and salt to taste.


    Thursday, September 12, 2013

    Torta di Mele - Apple Cake


    Instead of a firm, crisp apple like Granny Smith, I prefer using one that will soften while baking, such as Fuji, Golden Delicious, or McIntosh.

    Ingredients
    1-1/4 cups all-purpose flour
    2 teaspoons baking powder
    Pinch salt
    1/2 cup (1 stick) unsalted butter, softened
    3/4 cup sugar
    2 eggs
    1/4 cup grappa or rum
    1 medium apple, peeled, cored, and thinly sliced
    • • •
    Confectioners’ sugar (optional)
    Ground cinnamon (optional)
    Preheat oven to 350°F. In a medium bowl, combine the flour, baking powder, and salt. In a large bowl, beat the butter and sugar until light and fluffy; beat in the eggs and grappa. Stir in the flour mixture.
    Spread the batter into a greased 9-inch springform pan. Making a decorative circular pattern, set the apple slices into the batter. Bake until a wooden pick inserted near the center comes out clean, about 50 minutes. Cool 15 minutes before removing from the pan. Serve warm, sprinkled with confectioners’ sugar and cinnamon, if desired.
    Serves 6 to 8.

    Sunday, August 25, 2013

    Istarska Fritaja OR Istrian Frittata


    A small handful of wild or regular asparagus
    a little water
    4 eggs
    oil
    2 thick slices prosciutto, cut into pieces

    To prepare the shoots of wild asparagus, gently bend the shoot and then
    break it where it's hard, and unbending. This part is very woody, and
    difficult to eat, but can be used to make asparagus stock. Cut the shoots
    into about 3 - 5 cm pieces.

    Warm the oil in a wide pan, and then add asparagus pieces to it. Cook on a
    low heat, until softened. Add a little water. This will evaporate quickly,
    and steam the asparagus slightly.

    When the asparagus is al dente, add the prosciutto pieces to it, and cook
    until the prosciutto is cooked, and it changes colour. Then add the eggs,
    and cook, stirring, until the eggs have set.

    Arrosto - Veal Roast


    2 garlic cloves, minced
    3 Tbsp olive oil
    1/4 tsp pepper
    1 tsp dried sage leaves
    1 Tbsp dried rosemary (if you have fresh, tuck branches and leaves under
      the string ties)
    1 boneless veal shoulder roast, 2 1/2 to 3 pounds, trimmed of fat, rolled
      and tied
    3 cups Chicken stock or broth [note: original recipe called for 2 cups
      stock plus 1 cup dry white wine]

    Preheat oven to 350F. In small bowl mix sage, rosemary, garlic, oil, and
    pepper. Rub surface of veal with this seasoned oil. Place roast in a large
    roaster pan with a lid. Pour 2 cups stock around veal. Roast partially
    covered for 1 hour, turning 2 or 3 times, until barely tender. Uncover and
    roast until lightly browned, about 15 minutes longer. Remove meat from pan,
    and tent with foil to keep warm. Put pan juices in a pan over medium heat,
    and bring juices to a boil, scraping up brown bits from bottom of pan. Add
    remaining stock to pan. Season with additional pepper to taste. Slice veal
    roast and serve with pan juices.

    Friday, August 16, 2013

    Homemade Nutella


    The first version of what would become the revolutionary invention of the century and what is now one of the most famous food specialities in the world – NUTELLA– was founded in a backroom of the pastry shop founded in Alba, Italy in 1944 by Pietro Ferrero. At that time there was very little chocolate because cocoa was in short supply due to War War II rationing. So Mr. Ferrero used hazelnuts, which are plentiful in the Piedmont region of Italy, to extend the chocolate supply. Now Nutella is sold almost worldwide.


    Ingredients

    • 2.5 oz (about 2/3 cups) roasted unsalted hazelnuts
    • 3/4 cup sweetened condensed milk
    • 3 oz (about 1/2 cup) unsweetened chocolate, finely chopped
    • 3 tbsp honey, agave nectar, or other liquid sweetener
    • a food processor
     The first step is to toast the hazelnuts. If you use the roasted unsalted hazelnuts from Oh Nuts, they technically don’t need to be toasted, but I think toasting nuts, even pre-roasted ones, adds a depth of flavor that’s important to the finished product.
    So place your nuts in a preheated 350 degree oven, and toast them until they’re brown and fragrant, about 10-12 minutes. Be sure to stir them every 3-4 minutes to keep them from burning. Once they’re toasted, set them aside until they’re no longer hot.

    The food processor is going to do most of the work in this recipe, so prepare yourself for a lot of food processor pictures. Start by adding the cooled, toasted hazelnutsto the processor bowl. Turn the food processor on, and after a minute or two you’ll be left with very finely ground hazelnuts. Wonderful for sprinkling on pastries, but that’s not what we’re going for, so keep processing.
    After another minute, the nuts will start to clump together around the blade, and you’ll find you have a smooth paste.
    After about 5 minutes, your hazelnuts should be processed into a liquid. Scrape down the sides and the blade and process until there are no lumps remaining. Set the hazelnuts aside while you prepare the chocolate portion of the recipe.
    The chocolate will need to be melted, so you can either use a microwave-safe bowl, or use the double boiler method on the stovetop. Whichever you choose, combine the chopped chocolate, condensed milk, and honey in a bowl.
    If you’re using a double boiler, put the bowl on a pan of simmering water on the stovetop, and heat it, stirring frequently, until the chocolate melts and the mixture is smooth. If you’re using the microwave, be sure to stir the mix after every 30 seconds to prevent overheating, and stop once everything is melted together.
    Now look, you’ve barely done any work and the Nutella’s almost finished. It’s magic! The final step is to add the warm chocolate mix to the bowl of the food processor that contains the liquefied hazelnuts.
    Process the mix for 1-2 minutes more, until it smooths out, loses a little graininess, and gets shiny and smooth. The more you mix the stiffer the Nutella gets, so be sure to stop while it is still nice and spreadable.
    If you’d like, you can taste it and add a pinch of salt or an extra squirt of honey to suit your taste. I’m usually too busy licking it off the spatula to make any final tweaks, though. Store your homemade Nutella in an airtight container in the refrigerator for up to one month.
    I would list all the ways you can eat homemade Nutella, but that list would go on for hours. Here’s just a sampling: on apples, bananas, or strawberries, with pretzels, spread on toast, with or without peanut butter, folded into a warm crepe, smeared on a cupcake as a quick frosting, stirred into warm milk to make hot chocolate, spooned over ice cream, swirled into brownie batter, or spread on croissants for the best wake-up you can imagine.


    Insalata di Riso - Italian Rice Salad


    A wonderful seasonal salad, perfect for picnics or for a fast meal on a hot Summer day.

    Ingredients:

    2 cups of Arborio rice
    2 cans of Tuna in Oil
    1 can of Corn, drained

    1 can of Peas, drained
    1 cup of chopped ham
    1 cup of cubed or shredded cheese (Fontina, Asiago or Mozzarella)
    1/4 cup of Italian Green Olives, pitted and chopped

    1/4 cup Black Olives, pitted and chopped
    1/4 Capers (optional)
     3 Tbsp of Fresh Lemon Juice
    1 cup of Cherry Tomatoes, halved
    6 Tbsp of Extra Virgin Olive Oil
    Salt and Pepper to taste
    3 Hard Boiled Eggs, peeled and roughly chopped


    Cook the rice according to packaged instructions, drain and add to a big bowl.
    Add in all of your ingredients and toss everything together well.
    Refrigerate for a couple hours before serving.

    Wednesday, August 14, 2013

    Gelato


    On a hot Italian Summer night you will find groups of friends chatting a laughing in a "Gelateria" sitting infront of a gourmet gelato.
    Simply put, gelato is ice cream that contains less fat. Many varieties are made with milk and some don’t contain egg yolks. Also, gelato counters are kept a little warmer than their ice cream counterparts. It allows it to remain softer, so “your mouth doesn’t get ‘frozen’ and you can taste the flavors better.”


    How to make gelato

    The simplest gelato is made with an egg custard and light cream or milk. All the flavors combinations in the world can be added to this simple base but it’s also very good on its own (or simply infused with a fresh vanilla pod).
    You can make this recipe with lactose-free milk or cream, soy milk (choose one with the mildest aftertaste), almond or rice milk. Just make sure that the milk or cream you choose can withstand heat (some will become grainy if cooked). Test it if the package doesn’t tell you (by boiling a small quantity and tasting it afterwards). If the texture is spoiled, at least you won’t have to throw away your whole gelato recipe.
    A little tip for service: because gelato contains less fat, it tends to freeze a lot harder.
    Take your gelato out of the freezer approximately 15 minutes before serving to soften it.


    Gelato di Crema – The base

    2 ½ cups 5% fat cooking cream or any kind of milk you like
    5 egg yolks
    ½ cup granulated sugar

    Heat the cream (or milk) until it is beginning to bubble, then cool slightly. Watch it closely if you don’t want to make a big mess because cream and milk reach their boiling point very suddenly.
    In a large heatproof bowl, beat the egg yolks and sugar until thick and creamy (about 2 minutes at medium speed). Beat the cooling cream very slowly into the eggs to warm the mixture gradually (if you add it too quickly, you may end up with scrambled eggs!).


    Put the bowl over a pan of gently simmering water and stir with a
    wooden spoon until the custard just coats the back of the spoon.


    Remove the bowl from the pan and let it cool. My trick is to place it
    in the sink filled with 2-3 inches of cold water and stirring it gently
    one in a while: this method cools the custard in about 10 minutes
    (you can also add ice to the water to make it even quicker).
    If you have time on your hands you can put it in the refrigerator.
    The important thing is that your custard is completely cooled when
    you put it in the ice cream maker.

    Prepare your fruits: Raspberry and Cherry Ripple Gelato
    This gelato contains cherry and raspberry puree, as well as diced
    fruits for texture. You could substitute pretty much any berry and
    I’m sure it would be equally good.


    Cherry puree
    2 cups pitted cherries, chopped
    ½ cup granulated sugar
    1/8 cup lemon juice (from approximately 1 lemon)


    Put everything in a saucepan and cook over medium-low heat for 10
     minutes. Let cool. Puree using a blender or a food processor.
    Save 1/3 cup of the cherry puree for the ripple.

    Raspberry puree
    1 cup fresh raspberries
    1/8 cup sugar
    1 tablespoon lemon juice


    Puree all the ingredients together in a blender or a food processor.
    Strain the puree with a fine mesh to remove the raspberry seeds.
    Set aside.

    Other ingredients for the ripple
    ¼ cup pitted and finely diced cherries
    ¼ cup lightly crushed raspberries
    1/3 cup cherry puree (reserved from the recipe above)


    Freeze the gelato:

    Blend your cooled custard base with the cherry and raspberry purees
    (except 1/3 cup cherry puree reserved for the ripple).
    At this point, you can add 2 tablespoons of any alcohol you think
    would taste good with your flavors (I added Absolut Raspberry Vodka).
    It’ll help keep your gelato more scoopable.
    Pour your fruit custard into an ice cream maker and freeze according
    to the manufacturer’s instructions. Stop the machine when the gelato is
    almost firm.


    To get a rippled gelato:
    Pour 1/4 of the gelato custard in a airtight container big enough to store
    the whole gelato recipe. On the gelato, pour 1/3 of the chopped fruits and
    1/3 of the reserved cherry puree. Repeat twice and end with a layer of
    gelato custard. Layering fruits and custard this way will create the
    beautiful rippled look when you scoop your gelato in serving cups.
    Put your assembled gelato in the freezer for an additional 30 minutes
    or until required. It will keep for a month.


    Yum!


    Tuesday, August 13, 2013

    Spinach and Artichoke Dip


    2 bags (1 lb. each) fresh spinach

    1/8 lb. butter − not margarine

    1 tsp. minced fresh garlic

    2 tbls. minced onions

    1/4 cup flour

    1 pint heavy cream (whipping cream)

    2 teas. fresh squeezed lemon juice

    1/2 tsp. Tabasco sauce (to taste)

    1/2 tsp. salt

    2/3 cup fresh grated Parmesan cheese

    1/3 cup sour cream

    1/2 cup grated Monterey Jack cheese

    artichoke hearts, coarsely diced


    Steam spinach − strain and squeeze through cheesecloth. Must be

    very dry. Chop finely and set aside. In heavy saucepan, melt butter.

    Add garlic and onions and saute about 3−5 minutes. Add flour to make

    a roux. Stir and cook about 1 minute. Slowly add heavy cream, stirring

    with a whisk to prevent lumping. Mixture will thicken at the boiling

    point. When it thickens, add lemon jiuce, Tabasco, salt and

    Parmesan cheese. Remove from heat and let stand 5 minutes. Stir in

    sour cream. Fold in dry, chopped spinach, coarse diced artichoke

    hearts and Jack cheese. Stir until cheese is melted. Serve

    immediately, or portion and microwave to order.

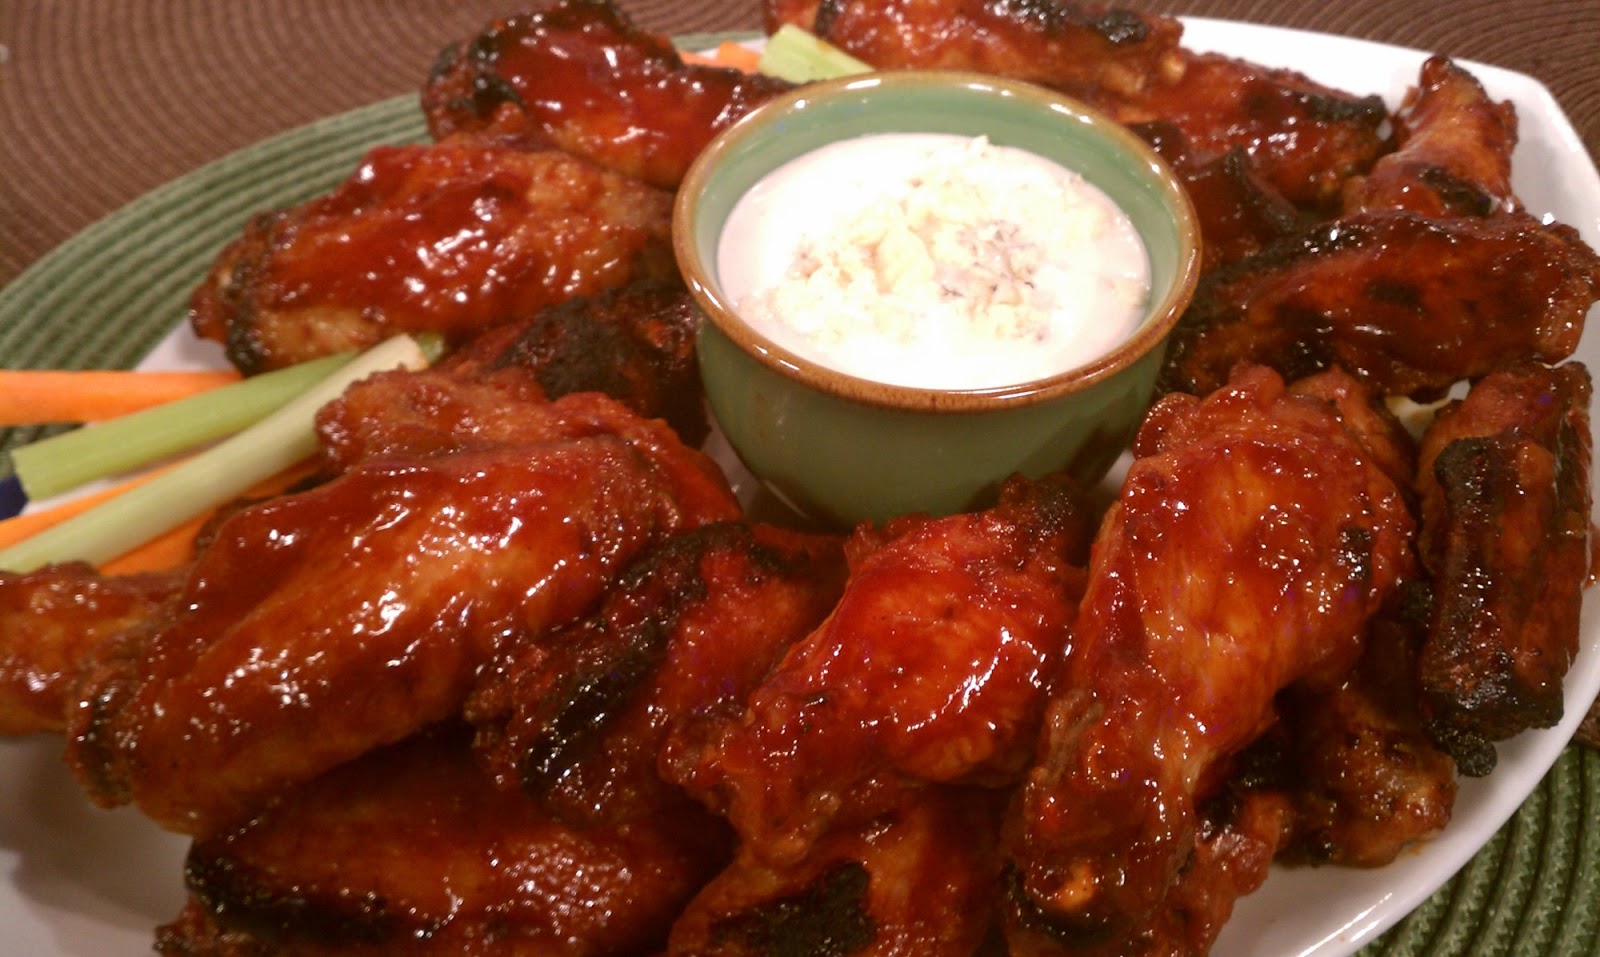
    Buffalo Wild Wings - An American Classic


    2 lbs. chicken wings (disjointed − discard the tips)

    1/4 Lb. Margarine (do not use butter!)

    8 Oz. Hot Sauce

    Oil for frying


    1. Melt margarine in sauce pan until barely liquid.

    Add hot sauce, mix, and put aside.

    2. Deep fry wings until brown and crispy. Remove

    and drain on paper towels.

    3. Put wings in a large bowl that has a cover. Pour

    sauce over all, cover, and shake to coat the wings.

    Serve with celery sticks and Ranch Dressing (see recipe

    for homemade Ranch Dressing) 

    Adjust the amount of hot sauce to your desire.


    Ranch Dressing from Scratch

    This is a base recipe, then you can freely add other ingredients here and there
    to achieve the flavor you like. The flavor of the from-scratch recipe is incredible.
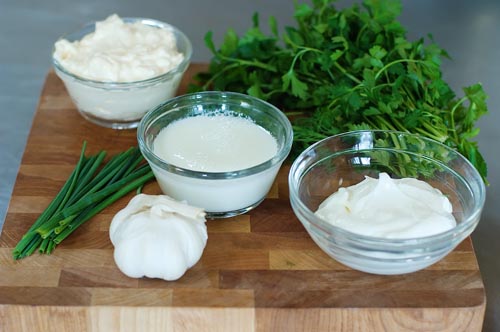
    039

    Mayonnaise (NOT Miracle Whip), Sour Cream, Buttermilk or Regular Milk,
    Garlic, Italian (Flat Leaf) Parsley, Chives, and Salt.

    Other optional ingredients: Fresh Dill, Worcestershire Sauce, Cayenne Pepper,
    Paprika, Fresh Oregano, Tabasco.
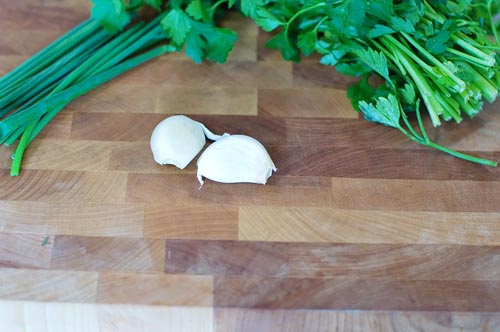
    040

    First, start with 1 to 2 cloves of garlic. Chop up the garlic pretty finely.
    Then, sprinkle about 1/8 to 1/4 teaspoon (or a healthy pinch) kosher salt on top.
    Regular salt would also work fine in a pinch.
    By the way, Morton’s makes kosher salt and it can be found in most supermarkets.
    Kosher salt is NOT kosher. Kosher salt is used in the preparation of kosher meats,
    and it’s characterized by flat flakes that easily adhere to the surface of foods.
    In this case, though, it will act as an abrasive.
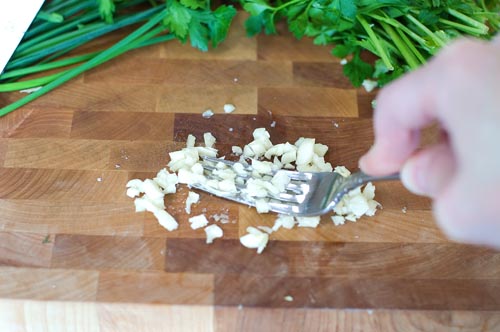
    045

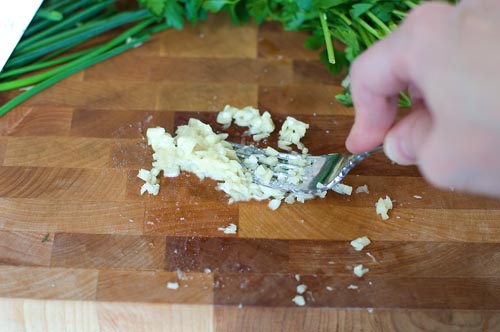
    Now, with the back of the knife or a fork, begin mashing the garlic into a fine
    paste.
    046

    This starts out a little slow, but before too long it’ll start mashing up and changing
     in consistency. The coarse salt helps the process along.
    048

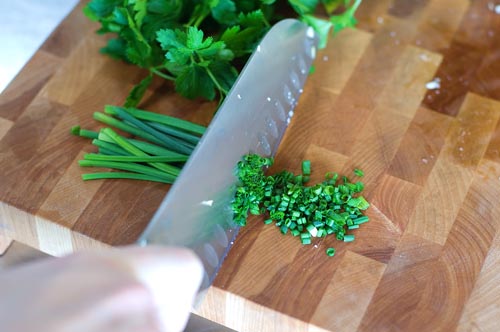
    Now chop up some fresh chives. I am mildly obsessed with fresh chives lately.
    They’re easy to grow, too! And they make the prettiest purple flowers…
    but we’ll talk about that later.
    Chop up around 2 tablespoons of chives to start with.
    .
    049

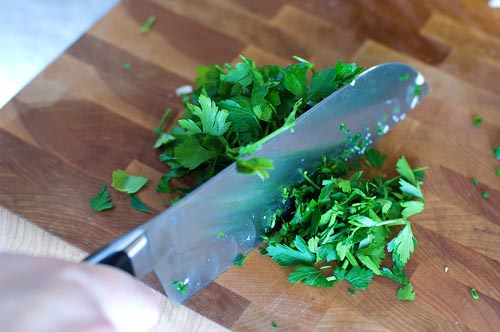
    And now for the parsley! You can be a little more generous here, as it doesn’t
    have quite the bite as the garlic and the chives.

    050

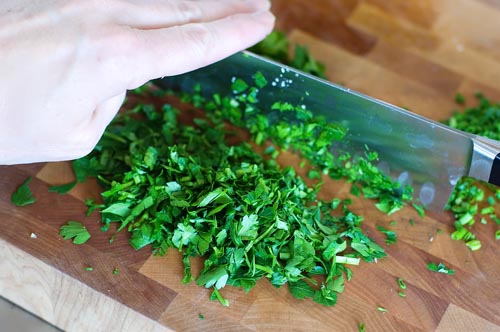
    Fresh parsley IS strong beyond a certain point, though. So start with about
    1/4 cup and you can add more from there.
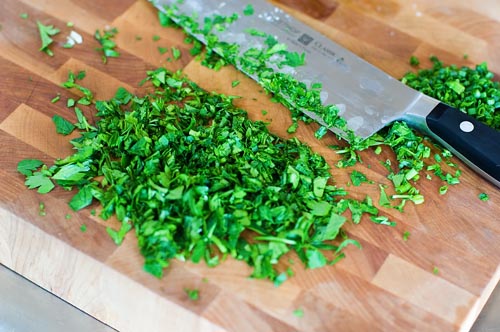
    DSC_0001

    Now! Before I proceed, let me point out the base ingredients for the creamy
    part of the dressing: Mayonnaise, Sour Cream, and Buttermilk (though
    regular milk will work, too.) I’ll show you the quantities I use, but I want
    to emphasize that YOU can find the precise mixture that works for you.
    But here’s how I approach it: the mayonnaise gives the dressing the solid, creamy,
    tangy base.
    I use more of it. The sour cream brings a thickness and a body to the dressing…
    but it’s light and mild in flavor. And the buttermilk, or the regular milk, acts as
    a thinning agent, bringing your ranch dressing to the proper consistency.
    Buttermilk will be thicker and tangier; milk will almost be a non-flavor…
    but will thin it quite a bit more. So if you like a highly pourable dressing,
    regular milk would be best.
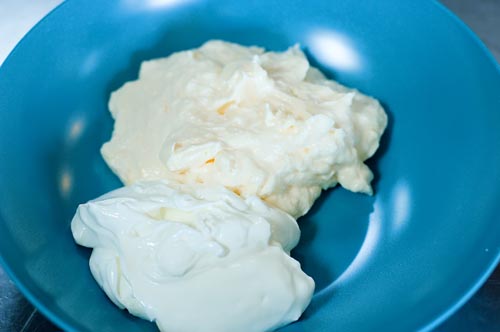
    DSC_0002

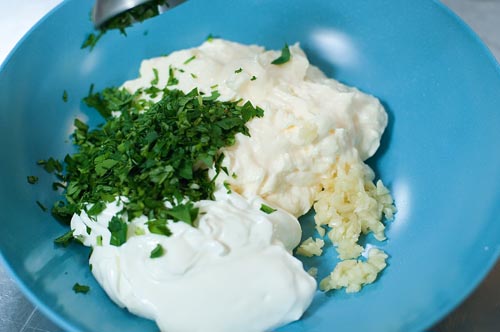
    I use a cup of mayonnaise and 1/2 cup sour cream. And the cool thing is,
    you can substitute the low-fat or fat-free stuff if you’re feeling particularly
    health conscious.
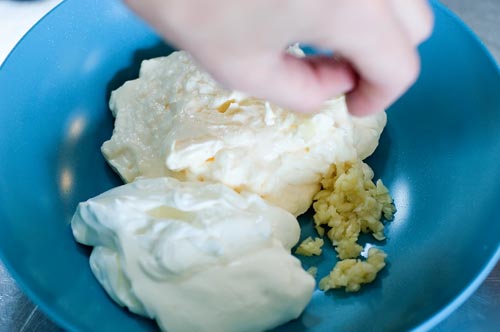
    DSC_0003

    Add garlic

    DSC_0005

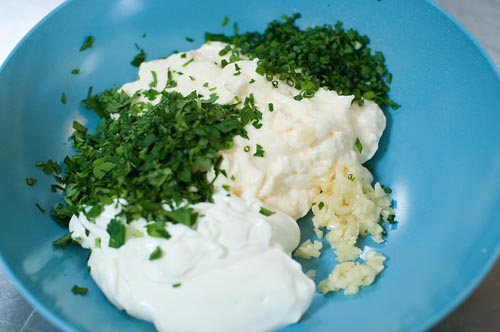
    Throw in the parsley…

    DSC_0006

    And throw in the chives.

    DSC_0007

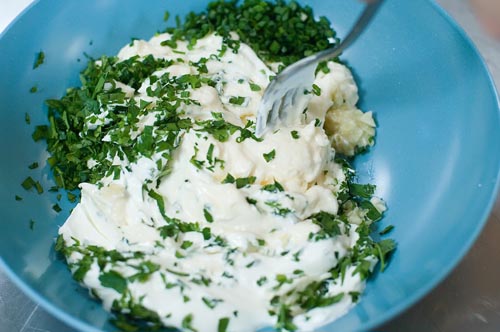
    Now give it a stir so you can evaluate the flavor and consistency…
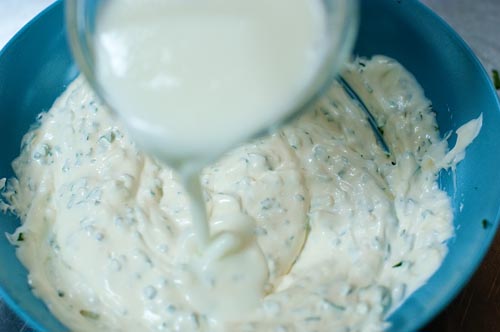
    DSC_0008Then add in buttermilk or milk as needed. If you find the flavor overwhelming or too salty, regular milk would cut/dillute that a bit.
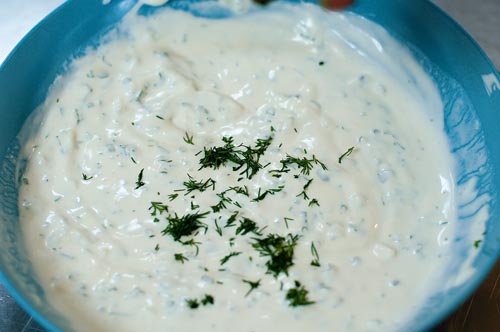
    DSC_0016 

    Now, I think fresh dill is REALLY delicious, so I add in about 1 to 2 teaspoons
    at least.
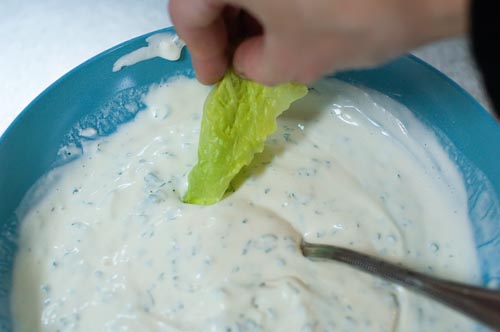
    DSC_0014I

    MPORTANT! Keep tasting as you go. And don’t just stick in the tip of your
    pinkie and taste a little dab
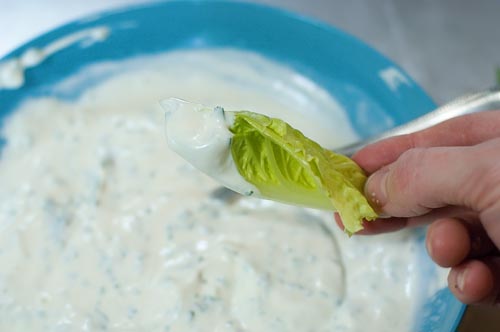
    DSC_0015That’ll always give you a more accurate gauge.
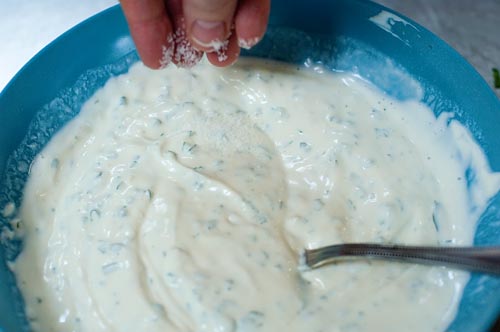
    DSC_0011

    Keep tasting as you go, adding more salt, if needed…
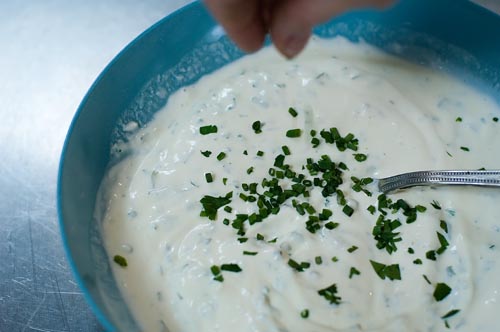
    DSC_0013

    Or more chives.... Or more parsley, or more dill…or you could go out on a limb
    and add any or all of the following: white vinegar, black pepper, cayenne
    pepper, a dash of worcestershire, paprika, fresh oregano, or Tabasco.
    Just know this: If you make it the way YOU like it, you absolutely can’t mess it up!
    I just made that up. But it sort of rings true, doesn’t it?
    Enjoy!